
Finding the right mockup tools often feels overwhelming when your tech accessories need to stand out in a crowded marketplace. Professional mockup design is your key to product images that capture attention and convey quality from the first glance. For e-commerce entrepreneurs worldwide, mastering each step of the mockup workflow means turning your unique designs into powerful selling points that drive more clicks and conversions.
Table of Contents
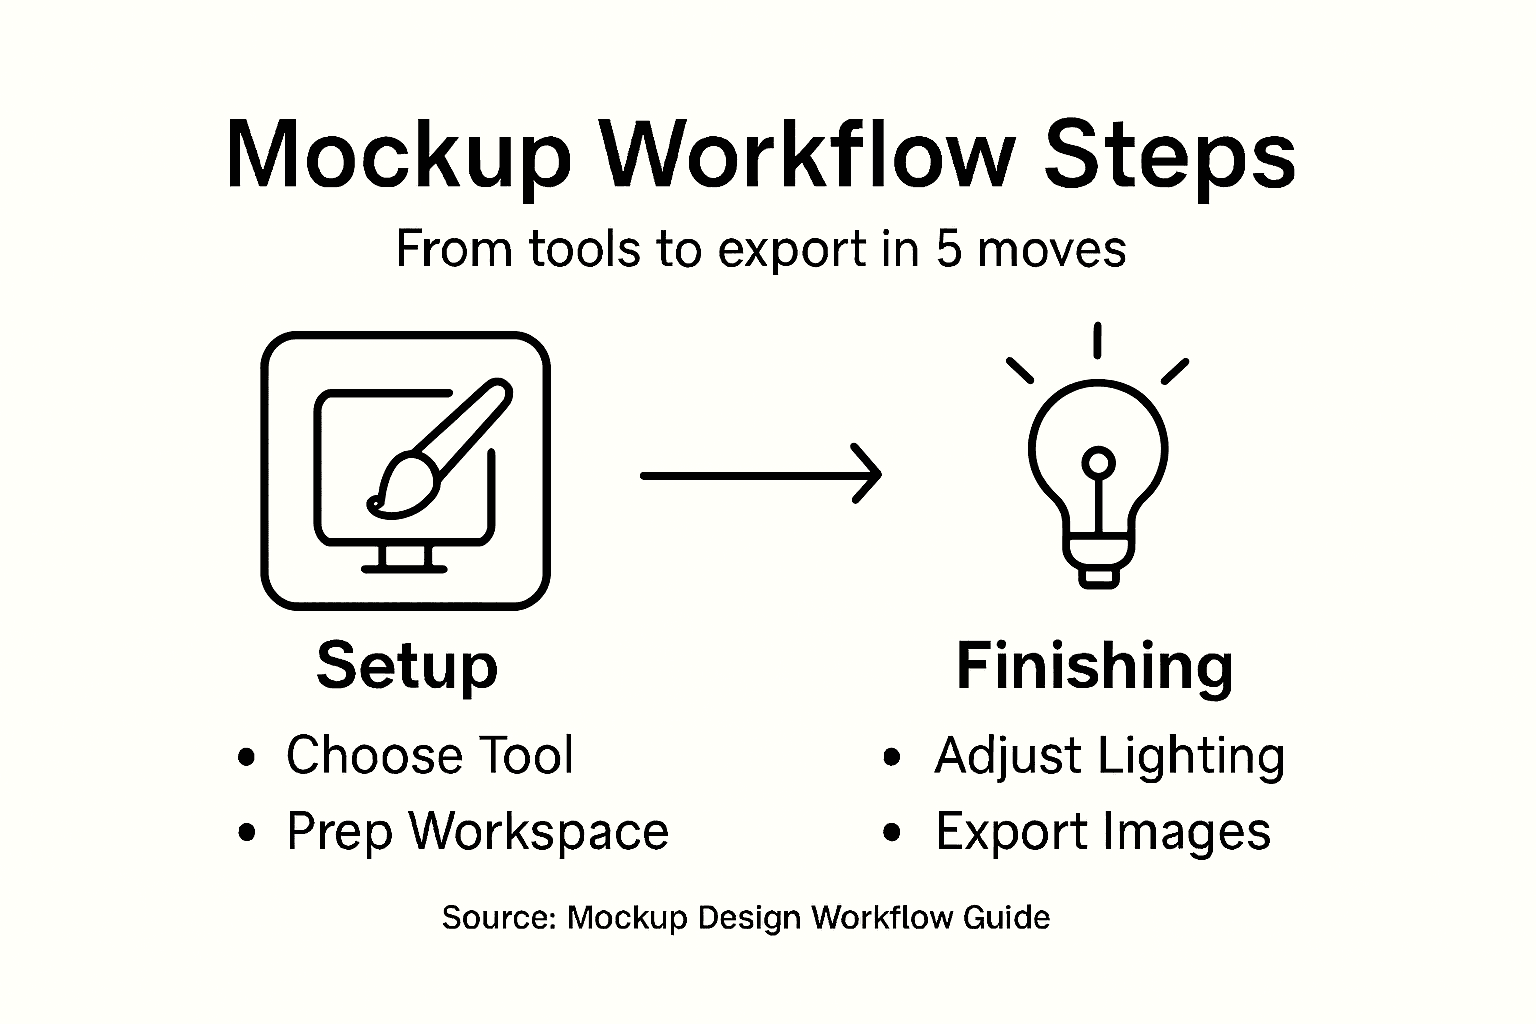
- Step 1: Set Up Your Mockup Design Tools
- Step 2: Select and Download the Ideal Mockup Template
- Step 3: Customize Mockup Layers with Your Product Design
- Step 4: Adjust Lighting and Presentation for Realism
- Step 5: Export and Review Final Product Images
Quick Summary
| Key Point | Explanation |
|---|---|
| 1. Choose the Right Mockup Tool | Select a design platform that fits your skill level and design needs, such as Adobe Photoshop or Canva for various capabilities. |
| 2. Select Relevant Mockup Templates | Your template should align with your product type and brand to effectively showcase features and aesthetic appeal. |
| 3. Customize Layers for Realism | Use Smart Object layers to replace placeholder designs and enhance realism by matching perspective and lighting conditions. |
| 4. Adjust Lighting for Professional Look | Manipulate lighting angles and shadows to create a lifelike representation that captures consumer interest effectively. |
| 5. Thoroughly Export and Review Images | Ensure final images are high-resolution, color-accurate, and visually consistent across different platforms before use. |
Step 1: Set Up Your Mockup Design Tools
Setting up your mockup design tools is the foundation for creating stunning product images that capture your brand’s essence. In this section, you’ll learn how to configure your workspace and select the right tools for professional mockup design.
Begin by choosing a design platform that offers robust mockup capabilities. Canva provides user-friendly mockup templates that work well for beginners and experienced designers alike. Your primary options typically include:
- Adobe Photoshop
- Canva
- Figma
- Sketch
- BetterMockups Template Library
Each platform offers unique features, but the key is selecting a tool that matches your technical skill level and design requirements. For most e-commerce entrepreneurs, platforms like Canva and BetterMockups provide an excellent balance of accessibility and professional quality.
Here’s how popular mockup design platforms differ:
| Platform | User Friendliness | Best For | Notable Strength |
|---|---|---|---|
| Adobe Photoshop | Moderate to complex | Advanced designers | Powerful editing |
| Canva | Very easy | Beginners, marketers | Ready-made templates |
| Figma | Moderate | UX/UI, collaboration | Real-time teamwork |
| Sketch | Moderate | Mac-based UX/UI | Vector precision |
| BetterMockups | Very easy | E-commerce mockups | One-click previews |
Professional mockup design requires selecting tools that match your specific product visualization needs and technical expertise.
When setting up your design environment, focus on creating a consistent workspace. This means:
- Install your chosen design software
- Organize your folders for mockup templates
- Ensure your computer meets minimum system requirements
- Download essential mockup template packs
Make sure your computer has sufficient processing power and graphics capabilities to handle design work smoothly. A computer with at least 16GB RAM and a dedicated graphics card will provide the best performance for complex mockup designs.
Pro tip: Invest time in learning keyboard shortcuts and workspace customization to dramatically improve your mockup design efficiency.
Step 2: Select and Download the Ideal Mockup Template
Selecting the right mockup template is crucial for creating professional product images that showcase your brand’s unique personality and appeal to your target audience. This step involves finding a template that not only looks great but also effectively communicates your product’s key features and aesthetic.
Top mockup resources offer diverse template options across multiple product categories and design styles. When choosing a template, consider these critical factors:
- Relevance to your specific product type
- Visual style and brand alignment
- Customization flexibility
- Resolution and image quality
- Platform compatibility
Start by browsing comprehensive mockup template collections that match your specific product needs. Look for templates that provide multiple angles, background options, and realistic rendering capabilities. Pay special attention to:
- Product category specificity
- Design resolution
- File format compatibility
- Licensing terms
The ideal mockup template transforms your digital design into a compelling visual story that resonates with potential customers.
Professional mockup selection requires careful evaluation of your technical requirements and design goals. High-quality templates should offer seamless customization and realistic product representation, enabling you to create images that look professional and authentic.
The following table helps you decide which mockup template to choose for your project needs:
| Product Type | Recommended Resolution | Key Customization Needed | Preferred Format |
|---|---|---|---|
| Apparel | 3000x3000 px or higher | Change color & logo easily | PSD or PNG |
| Packaging | 4000x4000 px | Update dielines, surfaces | PSD or PDF |
| Tech Devices | 1920x1080 px or higher | Screen content replacement | PSD |
| Stationery | 2000x2000 px | Change branding and layout | PSD or PNG |
Pro tip: Always download template previews and test them in your design workflow before committing to a full purchase or extended usage.
Step 3: Customize Mockup Layers with Your Product Design
Customizing mockup layers is the critical phase where your digital product design transforms from a concept into a realistic, professional visual representation. This step requires precision and understanding of how to manipulate design layers to achieve a seamless, high-quality product image.
Working with Smart Object layers in Photoshop enables you to integrate your product design with maximum flexibility and minimal image degradation. The process involves several strategic steps:
- Identifying the primary Smart Object layer
- Replacing placeholder designs
- Adjusting layer properties
- Matching perspective and lighting
- Ensuring high-resolution output
Follow these detailed steps to customize your mockup layers effectively:
- Open the PSD mockup template
- Locate the Smart Object layer
- Double-click the layer to open the embedded file
- Replace the placeholder design with your product image
- Save and return to the main mockup document
Precision in layer customization can transform an average mockup into a stunning, professional product visualization.
Pay close attention to design alignment and perspective matching. This ensures your product looks natural within the mockup environment. Advanced techniques like adjusting layer opacity, applying shadows, and fine-tuning color balance can elevate your mockup from basic to extraordinary.
Pro tip: Create a duplicate of the original mockup file before making changes to preserve your baseline template and enable easy iteration.
Step 4: Adjust Lighting and Presentation for Realism
Adjusting lighting and presentation transforms your mockup from a basic template into a compelling, lifelike product visualization that captures potential customers’ attention. This critical stage determines how professionally and authentically your product will be perceived.
Advanced Photoshop techniques enable designers to create stunning, realistic mockups through strategic lighting manipulation. The key is understanding how subtle adjustments can dramatically enhance your product’s visual appeal:
- Simulate natural light angles
- Apply strategic shadow effects
- Adjust layer blending modes
- Enhance texture and depth
- Fine-tune color temperature
Follow these detailed steps to elevate your mockup’s realism:
- Select appropriate blending modes
- Use Multiply and Overlay layers
- Add subtle shadow effects
- Adjust layer opacity
- Match lighting conditions
Masterful lighting transforms a digital mockup into a believable, engaging product representation.
Realistic presentation requires careful attention to detail. Mockup platforms offer adjustable lighting options that help you create precise, professional visualizations. Focus on matching real-world lighting conditions, including subtle reflections, appropriate shadows, and natural color gradients.
Pro tip: Experiment with multiple lighting scenarios and save different versions to find the most compelling product presentation.
Step 5: Export and Review Final Product Images
Exporting and reviewing your final product images is the critical concluding phase of your mockup design workflow. This step transforms your carefully crafted design into a marketing-ready visual asset that represents your brand and product with professional precision.
Mockup design platforms support comprehensive export options that enable seamless preparation of images for various marketing channels. Understanding the nuanced export process ensures your product images look stunning across different platforms:
- Select appropriate file formats
- Check image resolution
- Verify color accuracy
- Inspect design details
- Test across multiple devices
Follow these systematic steps to guarantee a flawless export:
- Choose high-resolution file formats
- Set optimal image dimensions
- Review color profile settings
- Preview image at 100% zoom
- Create multiple variations
A meticulous final review separates professional product presentations from amateur attempts.
Ensure your exported images maintain design integrity across different platforms. This means checking color rendering, pixel clarity, and overall visual consistency. Look for subtle details like shadow definitions, texture representations, and background integration that elevate your product visualization.
Pro tip: Create a standardized review checklist to systematically evaluate each mockup before final export.
Elevate Your Product Images with Professional Mockups
Struggling to streamline your mockup design workflow to create stunning product images that truly capture your brand’s essence? This guide highlights common challenges like selecting the perfect template, customizing layers precisely, and achieving realistic lighting to boost your product presentation. If you want to enhance your visual branding effortlessly and avoid time-consuming trial and error, Bettermockups has the ideal solution.
Discover our extensive collection of high-quality, photorealistic mockups tailored for electronic accessories such as Apple Watch Bands Mockups – Bettermockups and Wireless Charger Mockups – Bettermockups. These ready-to-use PSD and Canva templates are designed for seamless customization allowing you to save hours while delivering professional results. Don’t let the complexity of mockup workflows hold back your sales potential. Visit Bettermockups now to access premium assets that elevate your product listings and marketing campaigns instantly.
Frequently Asked Questions
How do I choose the right mockup design tool for my project?
Selecting the right mockup design tool involves evaluating your technical skill level and design requirements. Start by comparing user-friendly platforms like Canva or BetterMockups for ease of use or Adobe Photoshop for more advanced features.
What factors should I consider when selecting a mockup template?
When choosing a mockup template, consider product relevance, visual style, customization options, resolution quality, and licensing terms. Aim for templates that offer multiple angles and realistic rendering capabilities to effectively showcase your product.
How can I customize mockup layers to accurately represent my design?
To customize mockup layers, open the Smart Object layer in your mockup template and replace the placeholder design with your product image. Ensure you match the layer’s perspective and lighting to maintain a realistic look for your final product representation.
What steps can I take to adjust lighting for my mockup presentation?
To adjust lighting for your mockup, simulate natural light angles and add shadow effects to enhance realism. Experiment with various blending modes and save different versions to identify which lighting scenario presents your product most compellingly.
How do I ensure my final exported product images are high quality?
To ensure high-quality exports, select appropriate file formats and set optimal image dimensions. Thoroughly review image resolution and color accuracy before exporting to maintain design integrity across different platforms.
Recommended
- Mockup Terminology Explained: Clarity for E-Commerce Success – Bettermockups
- Why Use Product Mockups for E-Commerce Success – Bettermockups
- Types of Mockup Templates: Boosting Product Sales – Bettermockups
- What Is a Mockup? Transforming Product Presentation – Bettermockups
- DropPop | Depop Dropshipping


