
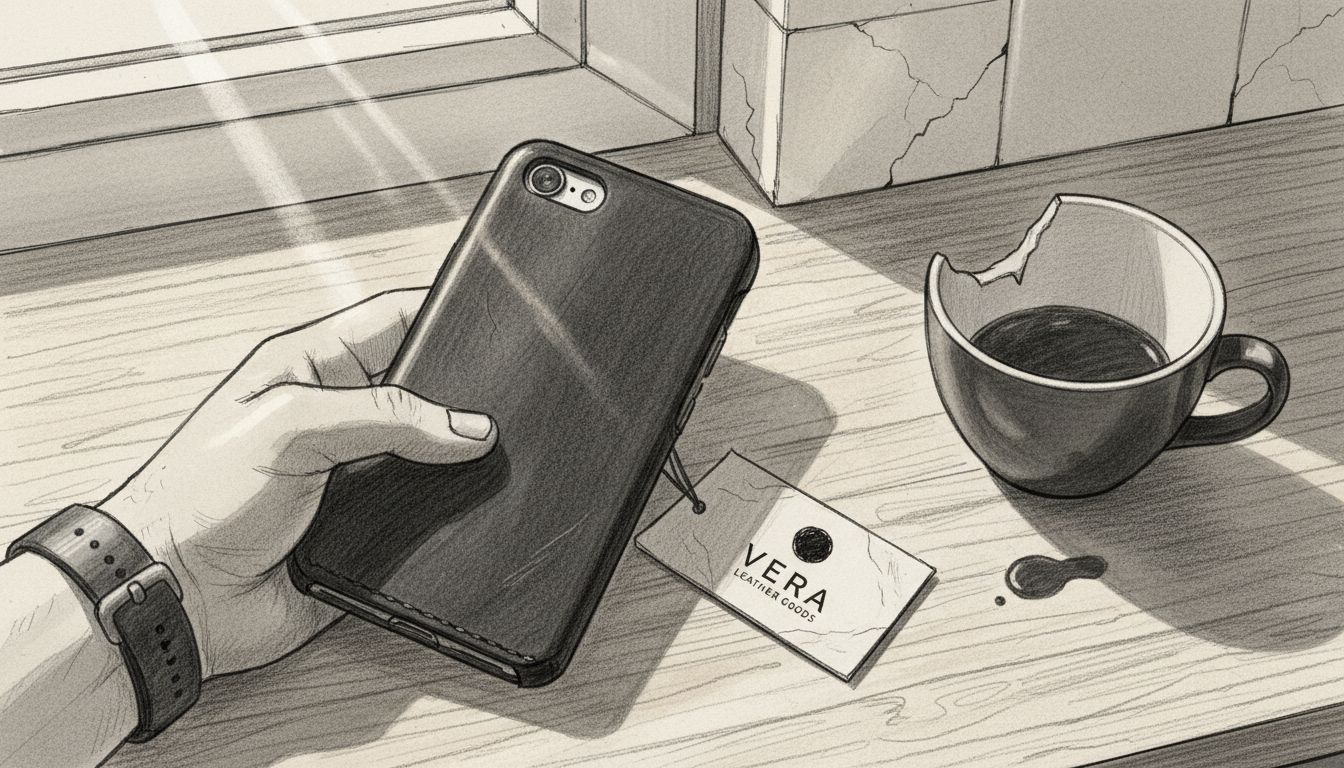
Your phone case designs are stunning, but blurry photos and poor lighting are costing you sales every single day. Professional product photography can increase conversions by up to 30%, transforming browsers into buyers through crisp, trustworthy images. This comprehensive guide teaches you practical techniques to capture professional phone case photos using just your smartphone and affordable lighting setups. You’ll master the exact methods successful sellers use to showcase texture, color accuracy, and design details that make customers click “buy now” with confidence.
Table of Contents
- Gathering The Right Tools And Materials For Phone Case Photography
- Step-By-Step Guide To Shooting Professional Phone Case Photos
- Editing, Optimizing, And Uploading Your Phone Case Photos For E-Commerce
- Common Mistakes And How To Avoid Them In Phone Case Photography
- Discover Professional Phone Case Mockups To Elevate Your Brand
- Frequently Asked Questions
Key takeaways
| Point | Details |
|---|---|
| Quality images boost sales | High-quality product images can increase conversions by up to 30% through enhanced customer trust and reduced uncertainty. |
| Multiple angles reduce returns | Showing products from various perspectives helps customers make informed decisions and decreases return rates significantly. |
| Consistent presentation builds brands | Using uniform lighting and backgrounds across all listings creates professional cohesion that strengthens brand recognition. |
| Optimized files improve performance | Properly compressed images load faster on mobile devices, improving user experience and search engine rankings. |
Gathering the right tools and materials for phone case photography
Your smartphone camera is more powerful than you realize for product photography. Smartphone photography can be as effective as DSLR when you combine it with proper lighting and thoughtful composition. The key difference isn’t the camera itself but how you control the environment around your product.
Start with these essential items for your phone case photo setup. You need a smartphone with at least 12MP camera resolution, a sturdy tripod to eliminate shake, a clean white backdrop material, and reliable light sources. A simple folding table creates the perfect shooting surface, while white poster board or seamless paper provides the professional background that marketplaces explicitly require as primary product photos.
Lighting transforms amateur shots into professional images instantly. Natural window light works beautifully during midday hours when positioned at 45-degree angles to your product. For consistent results regardless of weather or time, invest in two affordable LED panel lights or softboxes positioned on either side of your setup. Add white foam boards as reflectors to bounce light into shadows and create even illumination across your phone cases.
Essential equipment checklist:
- Smartphone with manual camera controls and grid display
- Adjustable tripod with phone mount for stability
- White seamless backdrop paper or foam board
- Two LED light panels or desk lamps with daylight bulbs
- White reflector cards to fill shadows
- Microfiber cloth for cleaning cases before shooting
- Small props like hands or lifestyle elements for context shots
Color accuracy matters tremendously for phone case photography because customers expect what they see. Lighting quality matters more than any post-processing software when capturing true-to-life colors. Use daylight-balanced bulbs rated at 5000K to 5500K, which replicate natural sunlight and prevent yellow or blue color casts that frustrate buyers.
Your shooting environment should be clean, organized, and free from distracting elements. Clear a dedicated space near a large window or set up a corner with controlled artificial lighting. Keep your white background wrinkle-free and extend it both behind and beneath your phone cases to create that seamless infinity look professional studios use. This simple setup technique eliminates harsh shadows and gives your products that floating appearance buyers associate with quality.
Pro Tip: Use your smartphone’s timer function or a Bluetooth remote shutter to trigger photos without touching the device. Even slight pressure on the screen can introduce blur that ruins otherwise perfect shots, especially in lower light conditions.
Exploring phone case design tips online sellers use can inspire your photography approach. Understanding design principles helps you identify which angles and features deserve photographic emphasis. The goal is showcasing your cases in ways that highlight their unique design elements while maintaining the clean, professional aesthetic that drives conversions.
Step-by-step guide to shooting professional phone case photos
Preparation prevents poor performance in product photography. Clean each phone case thoroughly with a microfiber cloth to remove fingerprints, dust particles, and manufacturing residue. Even tiny specks become glaring distractions when magnified in high-resolution images. Inspect cases under your lighting setup before shooting to catch imperfections your eye might miss in normal conditions.
Set up your background and position your lights for even, shadowless illumination. Place your white backdrop so it curves smoothly from horizontal to vertical without creases. Position your two light sources at 45-degree angles from your product, roughly three feet away at the same height as your phone case. This creates balanced lighting that reveals texture without harsh shadows.
Complete shooting workflow:
- Mount your cleaned phone case on a phone or stand at eye level with your camera
- Adjust your lights until exposure appears even across the entire case surface
- Frame your first shot with the case centered, filling 60 to 70 percent of the frame
- Capture the front view showing the primary design clearly and sharply
- Rotate to photograph the back, both sides, and top/bottom edges systematically
- Take close-up macro shots highlighting texture, button cutouts, and material quality
- Add lifestyle images showing the case on an actual phone in realistic settings
- Review each image on a larger screen to verify focus and exposure accuracy
Multiple angles build customer confidence because they eliminate uncertainty. Shoppers are 3x more likely to buy when they can examine products from every perspective. Shoot at least five angles: front, back, left side, right side, and a 45-degree angle that shows depth and dimension. These comprehensive views answer questions before customers even ask them.
Close-up detail shots separate professional listings from amateur ones. Zoom in to capture the texture of leather, the precision of button cutouts, the quality of printing, and the protective lip around the screen. These macro images prove your cases deliver the quality your descriptions promise. Use your smartphone’s focus lock feature by tapping and holding on the specific detail you want sharp.
Lifestyle photography creates emotional connections that white background shots cannot achieve alone. Show your phone cases being held, placed on desks, or used during activities your target audience relates to. These contextual images help customers visualize ownership and imagine the case fitting their lifestyle. Natural outdoor lighting works beautifully for lifestyle shots, adding warmth and authenticity.
Consistency across your product catalog builds brand recognition and professionalism. Maintain the same framing, background, and lighting style for every case you photograph. This uniformity makes your entire store feel cohesive and trustworthy, signaling to customers that you operate a serious business. Create a simple reference guide noting your exact camera distance, light positions, and frame composition.
Pro Tip: Enable your camera’s grid overlay and use the rule of thirds to position your phone cases slightly off-center. This subtle compositional technique creates more visually interesting images than perfectly centered products, catching the eye while maintaining professional standards.
Exploring phone case collage template options shows you creative ways to present multiple angles in single images. These layouts maximize information density while maintaining visual appeal. Additionally, reviewing real photo phone case mockups for Samsung S23 demonstrates professional standards worth emulating in your own photography work.
Editing, optimizing, and uploading your phone case photos for e-commerce
Basic editing enhances your photos without misrepresenting your products. Use mobile apps like Snapseed or Adobe Lightroom Mobile to adjust exposure, contrast, and color temperature subtly. Your goal is making images look natural and true to life, not creating artificial perfection that disappoints customers upon delivery. Keep editing minimal and consistent across all product images.
Color accuracy prevents returns and negative reviews that damage your reputation. Adjust white balance first to ensure your background appears pure white and your case colors match reality. Compare edited images to your physical products under natural light to verify accuracy. Oversaturated or artificially brightened colors might look appealing but create expectations your actual products cannot meet.
Removing minor background imperfections maintains professionalism without crossing into deception. Clone out dust specks, small shadows, or backdrop wrinkles using your editing app’s healing tool. Never remove or alter actual product features, scratches, or characteristics. The line between enhancement and misrepresentation is clear: fix the environment, never the product itself.
File size optimization dramatically improves your store’s performance and conversion rates. Reducing image file sizes by 50% can improve page load times by up to 2 seconds, leading to a 10% increase in mobile conversion rates. Large image files slow your pages, frustrate mobile shoppers, and hurt your search engine rankings through poor user experience signals.
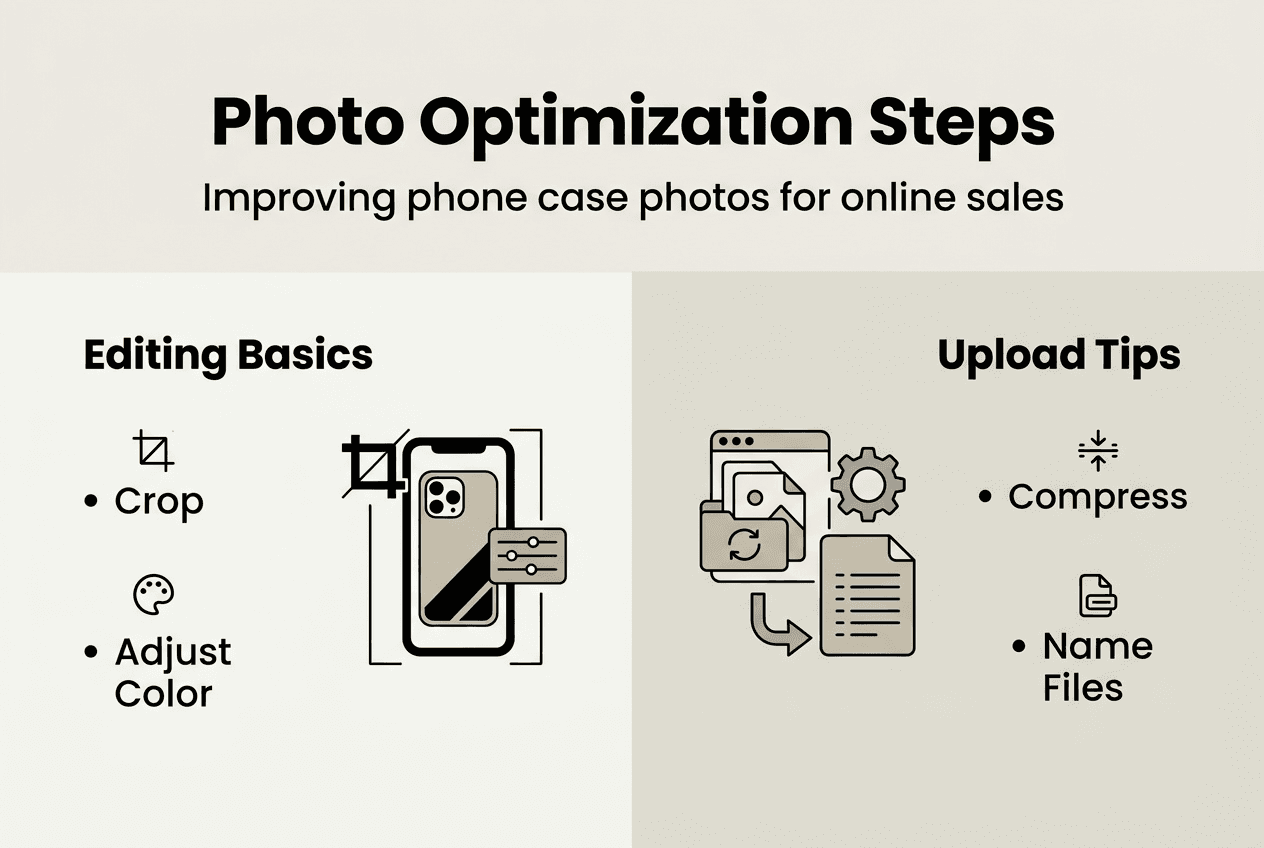
Image format comparison for e-commerce:
| Format | File Size | Quality | Best Use Case |
|---|---|---|---|
| JPEG | Small to Medium | Good | Primary product photos with compression |
| PNG | Large | Excellent | Images requiring transparency or text |
| WebP | Very Small | Excellent | Modern browsers, fastest loading |
Compress your images using tools like TinyPNG or Squoosh before uploading to your store. Aim for files between 100KB and 200KB for standard product images while maintaining sharp detail. Most e-commerce platforms automatically generate thumbnails, but uploading optimized originals ensures fast loading across all device types and connection speeds.
Marketplace requirements vary but generally demand specific dimensions and formats. Many marketplaces require white background images as primary photos, typically at 2000 pixels on the longest side. Research your specific platform’s guidelines for Amazon, Etsy, Shopify, or other channels you sell through. Meeting these technical specifications prevents rejection and ensures your listings appear professional.
File naming and alt text boost your SEO while organizing your image library efficiently. Name files descriptively using your target keywords: “leather-iphone-15-case-brown.jpg” instead of “IMG_1234.jpg”. Write alt text that describes the image for accessibility and search engines: “Brown leather iPhone 15 case with card holder slots”. These small details accumulate into significant organic traffic advantages.
Pro Tip: Save your original high-resolution images in a separate archive folder before compression and uploading. You’ll need these master files for future marketing materials, print advertising, or when platforms update their image requirements and you need to re-export at different specifications.
Learning how to boost sales professional phone case mockups 2026 strategies work complements your photography skills. Combining real photos with professional mockups creates diverse, engaging product galleries that appeal to different customer preferences and shopping styles.
Common mistakes and how to avoid them in phone case photography
Inconsistent lighting and backgrounds confuse customers and weaken your brand identity. Switching between yellow-tinted indoor shots and blue outdoor images makes your store look unprofessional and raises questions about product authenticity. Establish one lighting setup and background style, then replicate it exactly for every product you photograph. This consistency signals reliability and attention to detail.
Skipping multiple angles costs you sales by leaving customer questions unanswered. Buyers cannot physically handle your products, so comprehensive photography must compensate for this limitation. A single front-facing image forces customers to imagine the rest, creating doubt that prevents purchases. Shoot minimum five angles for every case, showing front, back, sides, and detail shots that reveal texture and quality.
Overediting creates unrealistic expectations that lead to disappointed customers and returns. Cranking saturation to make colors pop or applying excessive sharpening produces images that look artificial and untrustworthy. Poor lighting costs eCommerce sellers thousands in returns annually while proper illumination reduces product misrepresentation. Fix lighting during shooting rather than attempting rescue operations in post-processing.
Low-resolution images hurt both user experience and search engine optimization simultaneously. Blurry, pixelated photos make your products look cheap regardless of their actual quality. They also load slowly, frustrate mobile users, and signal to search engines that your site provides poor user experience. Always shoot at your phone’s maximum resolution, then optimize file size through compression rather than reducing dimensions.
Common photography pitfalls to avoid:
- Using cluttered backgrounds that distract from your product
- Shooting in mixed lighting that creates color casts
- Forgetting to clean cases before photographing
- Relying solely on front-view images
- Over-sharpening that creates unnatural halos
- Uploading images larger than necessary
- Inconsistent cropping and framing across products
Test your images across multiple devices before finalizing your listings. What looks perfect on your computer monitor might appear too dark on phones or washed out on tablets. View your photos on at least three different screens under various lighting conditions. This quality control step catches problems before customers see them.
“Proper lighting and accurate color representation reduce return rates by up to 40% because customers receive exactly what your images promised. Investing time in photography fundamentals pays dividends through fewer complaints, better reviews, and higher repeat purchase rates.”
Pro Tip: Create a simple one-page checklist covering your entire photography workflow from cleaning to uploading. Following the same process every time eliminates forgotten steps and ensures consistent quality across hundreds of product photos. Consistency is the foundation of professional e-commerce photography.
Reviewing phone case marketing tips for higher sales helps you understand how photography fits into your broader promotional strategy. Great images are just one component of successful marketing, but they’re the component that makes every other tactic more effective.
Discover professional phone case mockups to elevate your brand
While mastering photography techniques gives you control and authenticity, professional mockups offer speed and consistency that complement your real product shots. Bettermockups provides photorealistic templates designed specifically for phone case sellers who need stunning visuals without expensive photo shoots for every design variation.
Our video mockups for phone cases bring your products to life with motion that static images cannot achieve. These animated templates showcase your designs from multiple angles in seconds, perfect for social media marketing and product page galleries. Explore our constantly updated new mockups collection featuring the latest phone models and trending presentation styles. Getting started is simple with our detailed guide on how to use our mockups, helping you create professional product visuals in minutes rather than hours.
Frequently asked questions
What smartphone settings optimize phone case photography?
Use your phone’s highest resolution setting and disable digital zoom, which degrades image quality significantly. Enable the grid overlay to align your products using the rule of thirds for more engaging composition. Switch to manual or pro mode if available to control exposure and focus precisely. Tap to focus on your product’s most important feature, then lock exposure by holding your finger on screen until you see AE/AF Lock. This prevents the camera from refocusing or changing brightness mid-shoot. Set ISO as low as possible, ideally 100 to 200, to minimize grain and noise in your images.
How important are lifestyle shots for phone case product listings?
Lifestyle shots dramatically increase engagement by showing your cases in real-world contexts that help customers visualize ownership. Lifestyle shots increase engagement and help customers visualize ownership, reducing return rates by setting accurate expectations. These contextual images answer the question “How will this look in my life?” that white background shots cannot address. They also provide authentic social proof when showing actual people using your products. Include at least two lifestyle images per product alongside your technical white background shots for the most effective product galleries.
Can I rely solely on smartphone photos instead of hiring a professional photographer?
Smartphone photography, when done correctly, can rival DSLR product shots with proper lighting and composition techniques. Modern smartphones capture sufficient resolution and detail for e-commerce needs, especially when you control your environment carefully. Professional photographers offer advantages for complex shoots requiring specialized equipment, advanced lighting setups, or when photographing hundreds of products requiring absolute consistency. For most phone case sellers starting out or operating on limited budgets, mastering smartphone photography delivers professional results without the expense. As your business scales, you can always upgrade to professional services while using the foundational skills you’ve developed.
How many photos should each phone case listing include?
Include minimum seven images per listing: one primary white background front view, four additional angle shots showing back and sides, one close-up detail shot, and one lifestyle image showing the case in use. More images generally correlate with higher conversion rates up to about 10 to 12 photos, after which diminishing returns set in. Prioritize quality and variety over quantity. Each image should answer a specific customer question or showcase a unique product feature. Consider adding comparison shots showing your case next to competitors or demonstrating special features like card holders or kickstands.
What background color works best if white backgrounds feel too stark?
White backgrounds remain the gold standard for primary product photos because they meet marketplace requirements and focus attention entirely on your product. For secondary lifestyle or styled shots, light gray, soft beige, or subtle textures can add visual interest without overwhelming your cases. Avoid busy patterns, bright colors, or dark backgrounds that compete with your product or make details hard to see. If you want to differentiate your brand through background choices, maintain consistency across your entire catalog so customers recognize your distinctive style immediately.


